Adding conditional formats to geographic map markers
After a geographic map is created, each value in a group is bound with a marker. You can add some conditional formats to the markers, then when a specified condition is fulfilled, the format bound with the condition will be applied to the markers automatically for distinguishing.
However, for geographic maps in web reports and library components, the conditional formats are applied based on the advanced settings of the Shape By option, in other words, when the marker shape is controlled by image. If you apply conditional formats to a geographic map the shape of which is controlled by field or shape, the field or shape that you has specified to the Shape By option will be ignored after the conditional formats take effect.
To add conditional formats to geographic map markers:
- Select the geographic map and then do one of the following:
- Click Format > Conditional Formatting on the menu bar.
- Click the Conditional Formatting button
 on the Format toolbar.
- Right-click the geographic map and select Conditional Formatting from the shortcut menu.
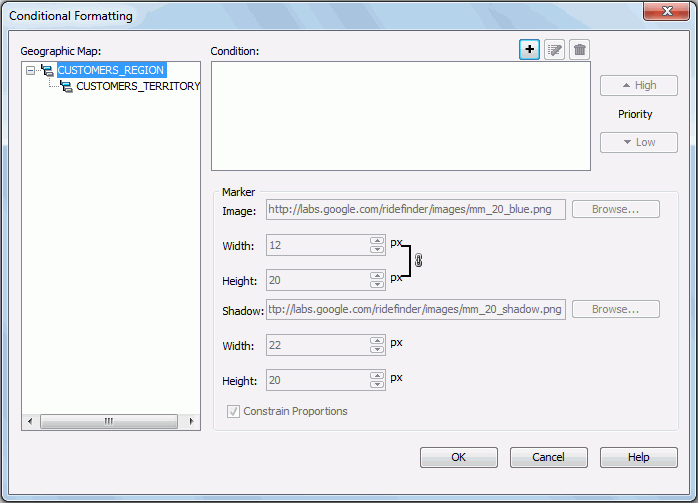
The Conditional Formatting dialog appears. See the dialog.
- Select a group level from the Geographic Map box, then click
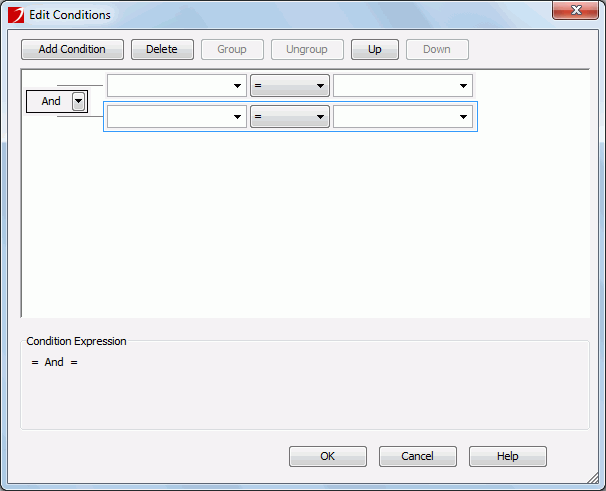
 above the Condition box. The Edit Conditions dialog appears. See the dialog.
- Click the Add Condition button to add a condition line.
- From the field drop-down list, select the field on which the condition will be based.
- Choose the operator with which to compose the condition expression from the operator drop-down list.
- From the value drop-down list, select the value of how to build the condition. You can also type in the value manually.
- Click Add Condition to add more condition lines and define the relationship between the condition lines.
- When done, click OK to save the condition. The newly added condition will then be displayed in the Condition box of the Conditional Formatting dialog.
- In the Marker box, specify the settings which will be applied to the marker of the selected group level when the condition is fulfilled, including the image, the shadow image, and their width and height. If you want to change the width and height for the image/shadow image at the same time in a certain proportion, check Constrain Proportion.
- Repeat the above steps to add more conditions and define the marker properties for each condition.
To edit a condition, select the condition from the Condition box, click  , then edit the condition in the Edit Conditions dialog.
To adjust the priority of the conditions, select a condition and click the High or Low button.
To remove a condition and the corresponding marker properties, select the condition from the Condition box and then click  .
.
- When done, click OK to save and apply the settings.